


The spine is a critical body part that plays an essential role in supporting the body’s structure and its vital functions.
Like a strong pillar, it keeps us standing erect; allows us to move, sit and bend; protects the nervous system; and enables communication between the brain and the rest of the body.
We want to keep our spine like a snake’s – extraordinarily limber and flexible so that we can move fluidly for the rest of our lives.
Unfortunately, so many of us neglect proper spinal care, ignore existing conditions and are hesitant to seek timely medical advice for spine-related problems, thinking they will eventually resolve on their own.
It’s estimated that four out of five people have experienced poor posture-related issues at some time in their lives.
Just look around at your family members at home or colleagues at the office, and notice how they are slouched over the computer or their electronic gadget.
As the years roll on, the components of the spine, i.e. the vertebrae (bones), discs, joints, soft tissues, nerves and spinal cord, can naturally degenerate and break down.
Conditions like osteoarthritis, disc degeneration and spinal stenosis (narrowing of the spinal canal) are related to the gradual ageing of the spine and can be associated with chronic pain.
Hence, it’s important to maintain a healthy spine/back throughout our life to keep it pain free and functioning well until we pass on.
With the Year of the Snake approaching soon, why not resolve to practise some “snake postures” to kick off the Lunar New Year?
You can learn to correct your posture, strengthen and improve back and shoulder flexibility, tone the abdomen, and expand the chest.
In yoga, there are several such postures.
One is called bhujangasana or the cobra pose (with its hood erect).
This posture nurtures the spine, opens the heart centre, and fosters a sense of expansion and vitality within the practitioner.
If you have experienced a back issue and have gotten help from a physiotherapist, you may have been taught a modified version of this posture.
The benefits, especially in relieving lower back pain and fighting fatigue, can be reaped immediately after doing it.
But of course, the more consistent you are, the better the results will be in the long run.
Beginners might not be able to do it immediately, so do follow the steps given below.
And do approach this “human cobra” with caution and awareness, paying particular attention if you have back injuries, are pregnant, had abdominal surgery (e.g. hernia), or suffer from wrist and shoulder injuries.
You can stay in each posture for as long as you’re comfortable, but no more than a minute.
Inhale on the way up and exhale while coming down, but maintain even breathing while you’re holding the posture.
Also, be sure to keep your legs on the floor all the time.
Pretty soon, you’ll be slinking around to envious glances!
Revathi Murugappan is a certified fitness trainer who tries to battle gravity and continues to dance to express herself artistically and nourish her soul. For more information, email starhealth@thestar.com.my. The information contained in this column is for general educational purposes only. Neither The Star nor the author gives any warranty on accuracy, completeness, functionality, usefulness or other assurances as to such information. The Star and the author disclaim all responsibility for any losses, damage to property or personal injury suffered directly or indirectly from reliance on such information.
Already a subscriber? Log in
Get 20% OFF The Star Digital Access
Cancel anytime. Ad-free. Unlimited access with perks.

Step 1 (Sphinx pose): Lie on the floor with elbows below the shoulder. Move your shoulder blades closer together to lift up your chest. Look straight ahead and feel your lower back muscles stretching. If you feel your back compressing, ease it by moving your elbows forward. This pose helps counteract a sitting or hunched posture, decompresses the lower back and stretches the psoas muscle in the hips. — Photos: REVATHI MURUGAPPAN/The Star
Step 1 (Sphinx pose): Lie on the floor with elbows below the shoulder. Move your shoulder blades closer together to lift up your chest. Look straight ahead and feel your lower back muscles stretching. If you feel your back compressing, ease it by moving your elbows forward. This pose helps counteract a sitting or hunched posture, decompresses the lower back and stretches the psoas muscle in the hips. — REVATHI MURUGAPPAN/The Star
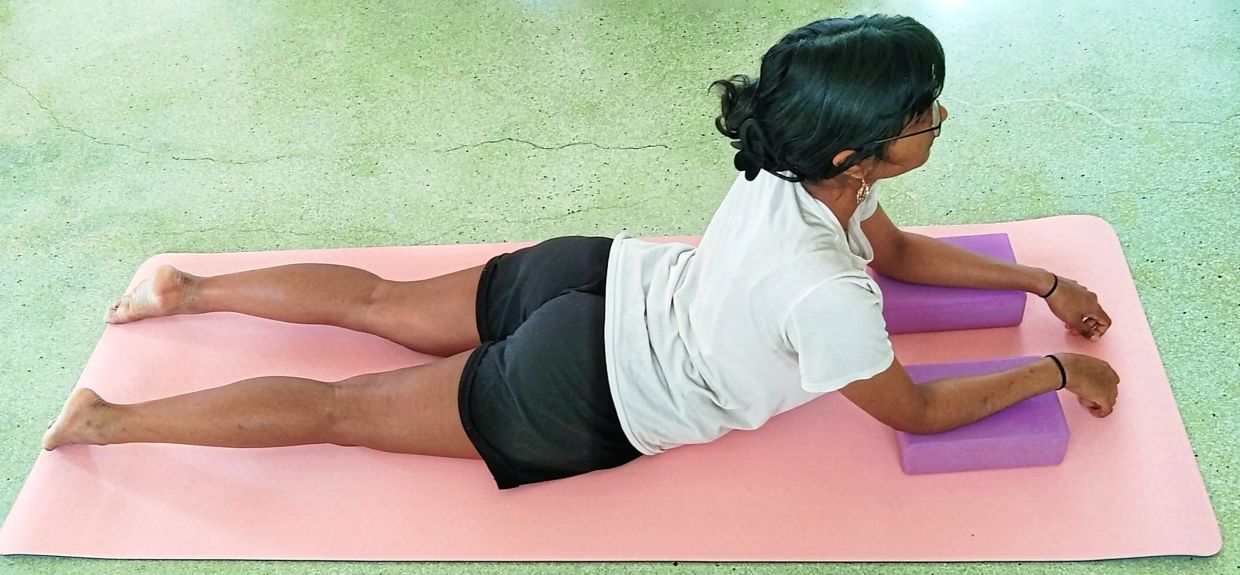
Step 2: To deepen the stretch in the lower back, place a block (or folded blanket) under each forearm. To start, the elbows should be slightly in front of the shoulders as shown in this picture. As you get more comfortable, you can move the elbows directly below the shoulders.
Step 2: To deepen the stretch in the lower back, place a block (or folded blanket) under each forearm. To start, the elbows should be slightly in front of the shoulders as shown in this picture. As you get more comfortable, you can move the elbows directly below the shoulders. — REVATHI MURUGAPPAN/The Star
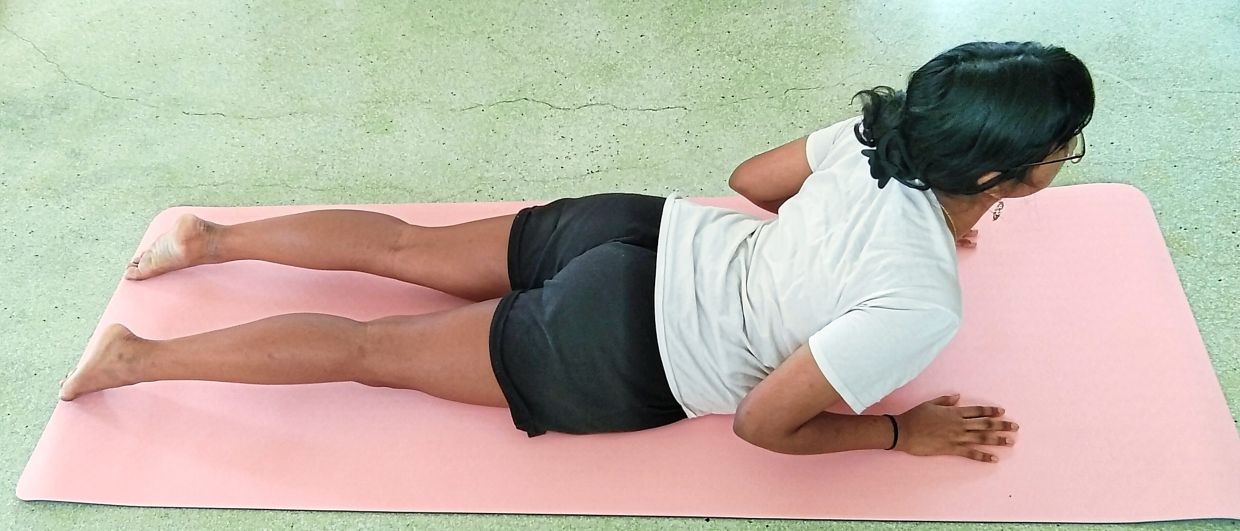
Step 3 (Baby cobra): You’re ready for the baby snake! Place your palms beneath your shoulders with elbows facing back and legs hip-width apart. Gently press your palms down and lift your upper body off the floor without squeezing your buttock muscles. Once your back muscles are stronger, lift your palms about 5cm (or as high as you can manage) off the floor and hold the position for three counts.
Step 3 (Baby cobra): You're ready for the baby snake! Place your palms underneath your shoulders with elbows facing back and legs hip-width apart. Gently lift your upper body off the floor without squeezing your buttock muscles. Once your back muscles are stronger, lift your arms off the floor and hold the position for three counts. — REVATHI MURUGAPPAN/The Star
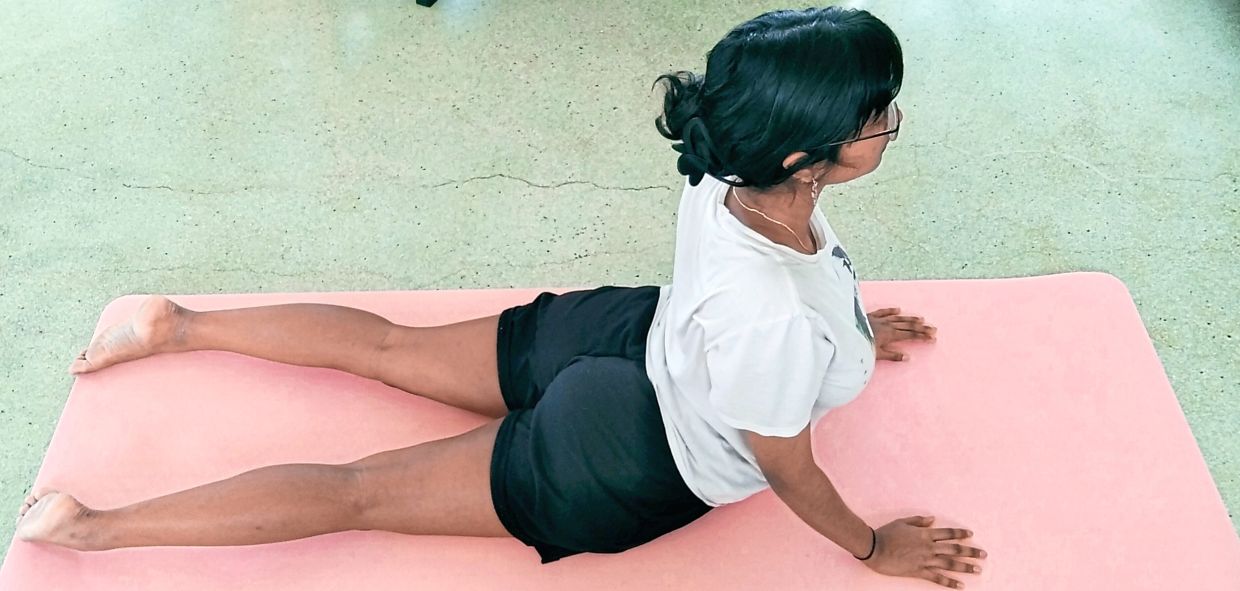
Step 4 (Cobra pose): If all the steps above are easy, it’s time to attempt the cobra pose. Follow step 3, then lift your upper body higher, rolling your shoulders back and down so that your neck remains long. Focus on lifting the sternum instead of lifting your chin. Keep a slight bend in your elbows, ensuring your pubic bone always stays on the floor. Again, remember to relax your buttock muscles, but pull your belly button in.
Step 4 (Cobra pose): If all the steps above are easy, it's time to attempt the cobra pose. Follow step 3, then lift your upper body higher, rolling your shoulders back and down so that your neck remains long. Focus on lifting the sternum instead of lifting your chin. Keep a slight bend in your elbows, ensuring your pubic bone always stays on the floor. Again, remember to relax your buttock muscles, but pull your belly button in. — REVATHI MURUGAPPAN/The Star
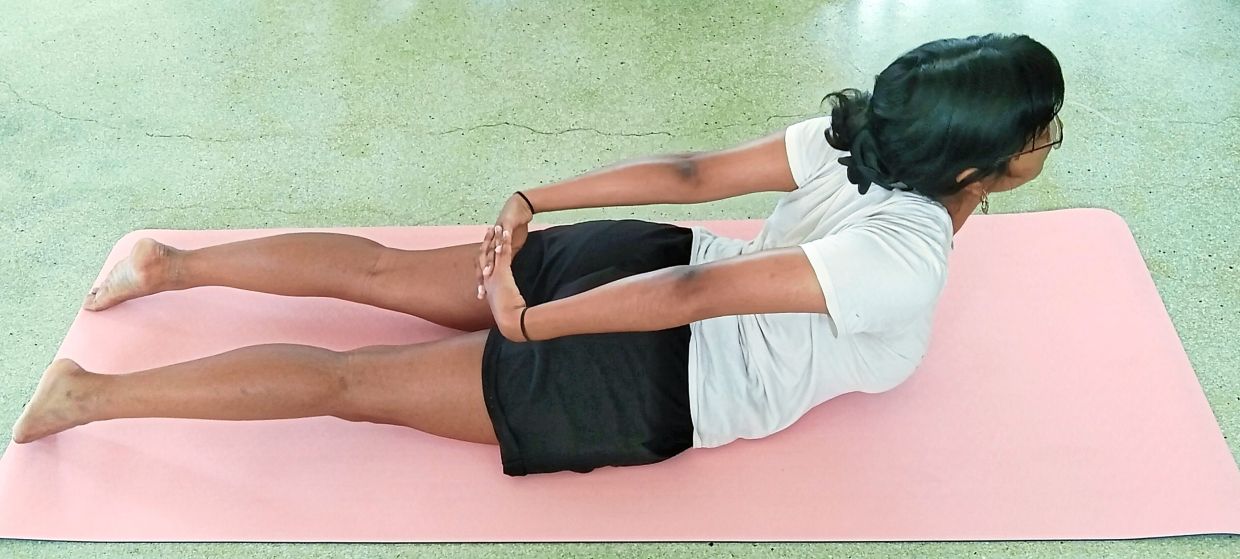
Snake pose: This is another version of the slithery reptile for those with wrist, carpal tunnel or shoulder injuries. Lie on your belly, lace your fingers together behind your back and lift your upper body off the floor. Move your arms up as high as you can. This pose corrects rounded shoulders and strengthens the back muscles. You can also turn your head from side to side to ease neck tension.
Snake pose: This is another version of the slithery reptile for those with wrist, carpal tunnel or shoulder injuries. Lie on your belly, lace your fingers together behind your back and lift your upper body off the floor. Move your arms up as high as you can. This pose corrects rounded shoulders and strengthens the back muscles. You can also turn your head from side to side to ease neck tension. — REVATHI MURUGAPPAN/The Star
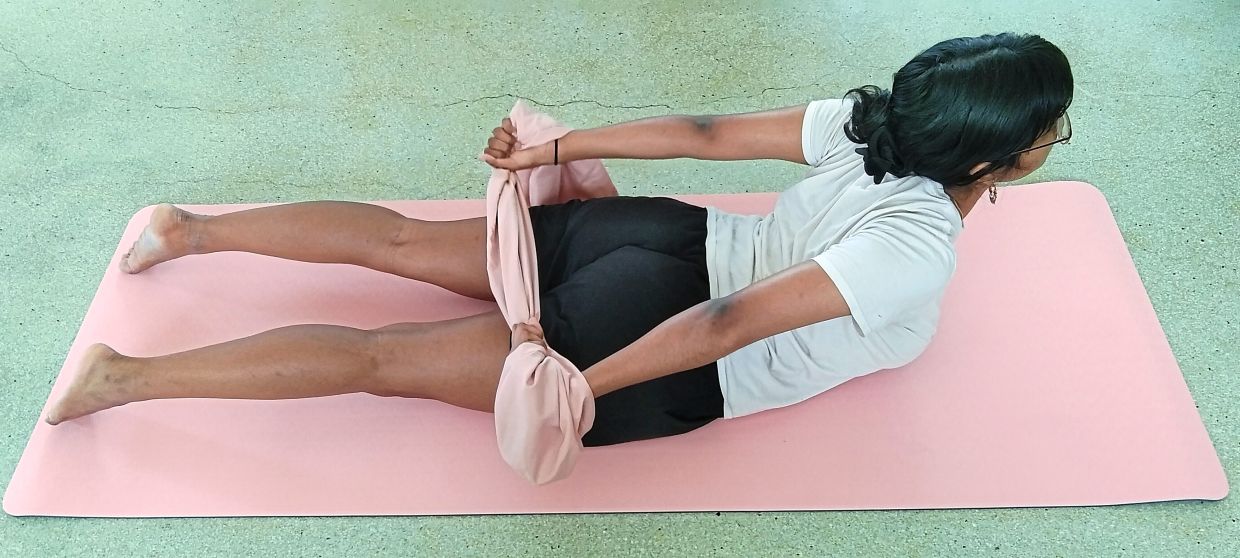
Modified snake pose: If you can’t lace your fingers, use a long towel (or strap) to assist in the stretch. Keep your arms in a wide-angle grip and inch them closer together as you get more limber.
Modified snake pose: If you can't lace your fingers, use a long towel (or strap) to assist in the stretch. Keep your arms in a wide-angle grip and inch them closer together as you get more limber. — REVATHI MURUGAPPAN/The Star